(Ps would leave you with a cutepic or something but they are all on my computer, so ya...)
Thursday, June 26, 2014
A Short Absence
Hey y'all! I just wanted you to know that I won't be posting for a while. I am not sure for how long but my computer is broken so I either need to get it fixed or more likely get a new one. Today I am just using my phone but I can't really post (good) photos and long post on a smart phone! So bye for now...... But hopefully not to long!
Tuesday, June 24, 2014
Spring Soap Crafting Club Part II∼ Coffee Ground Soap
This month's (well May's) soap was the coffee ground soap scented with Turkish Mocha. I have been meaning to make a coffee soap ever since I started making soap but, I had never gotten around to it until now. I replace five ounces of water with a strong brewed coffee and soaped the rest as normal.

First thing is this soap has NO COLORANT! that blackness is from the fragrance and the light brown is from a lesser concentration of the turkish mocha then the black half. I will say I do not like this scent at all it has some of that fake chocolate notes to it, but it looks like I was in the minority. I wish they gave us their new ecpresso scent, but it is not in the book but what are you going to do?
 This soap was super simple, to one half we added a touch of the FO and one Tbs of used coffee ground and to the other half was the rest of the FO. I swirled the divider but ended swirling it to the same position and the with a long skewer I did a few passes across the bar which gives it a similar look to a hanger swirl if you went across the bar(in a typical loaf mold), not up and down like my last post.

First thing is this soap has NO COLORANT! that blackness is from the fragrance and the light brown is from a lesser concentration of the turkish mocha then the black half. I will say I do not like this scent at all it has some of that fake chocolate notes to it, but it looks like I was in the minority. I wish they gave us their new ecpresso scent, but it is not in the book but what are you going to do?
*****Added 7/27/14
Thanks for stopping by and happy soaping!
Wednesday, June 18, 2014
Hanger Swirl Soap ∼ June Soap Challenge Club

Hey guys! today I will be doing a post on my first official soap challenge. Every one and a while I do the the months's design but I have never actually signed up.... Until this month. This month was the hanger swirl, but you could also do the feather swirl. I did the plain old hanger because there was no way I would be able to to a feather swirl under pressure, but one day(probably soon) I will try it. The soap I am showing you today though was not my first try. My first try was a dragon's blood soap that for some reason went faster then usual for me. So the hanger swirl didn't swirl, it does still look pretty cool so I will be doing a post on it next Man Soap Monday.
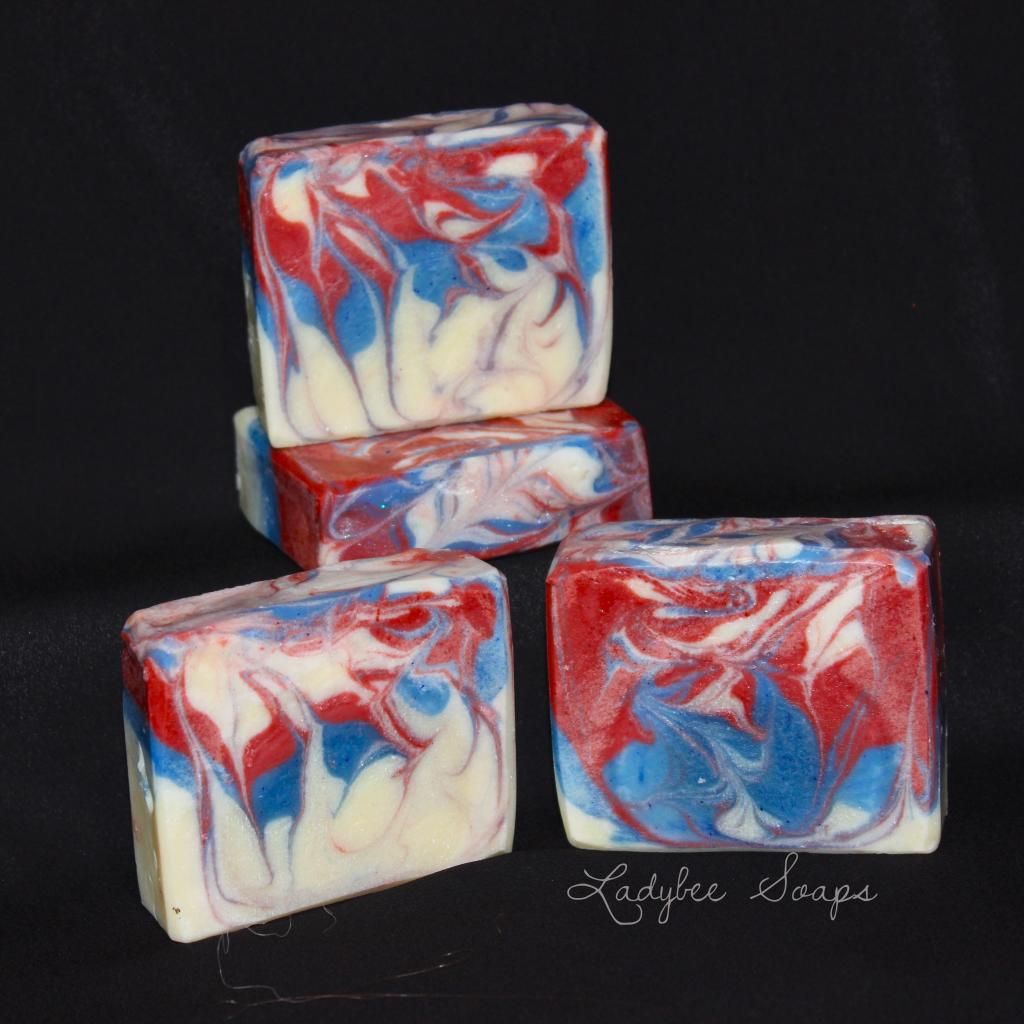
Since the 4th of July is coming up very soon (in soapers time) I decided to do a patriotic soap! I had no "Patriotic" scents (but really what is a patriotic scent, apples???). So instead I went for lemongrass essential oil, since I know it doesn't speed up and it still kind of go with the theme. The colors. of course, are red, white, and blue. to achieve the colors I used titanium dioxide, ultramarine blue, and for the red I used a combo if red oxide and electric bubblegum pigment.

Now on how I got the look! I spit the batch into 3 about equal portions and colored them their assigned color. then I poured them into less then equal, not so straight layers. I then raked through my modified hanger in up and down, then side to side motions. Then I poured stripes of the extra colors on top, swirled them with a chopstick, and then to complete the soap I added some glitter ('cause what else screams USA).
*****Added on 7/27/14
Thanks for stopping by and I will update y'all on how I did once I find out!

Friday, June 13, 2014
My First Lotion- a School Paper

Now on to my paper:
PLEASE READ THRU ALL INSTRUCTIONS BEFORE EVEN PREPARING FOR THIS RECIPE
Heated
Water Phase (combine these in the ~16
oz Pyrex)
|
|
Amount
|
Ingredients
|
18
oz
|
DISTILLED Water
|
Heated oil phase (combine
these in the ~32 oz Pyrex)
|
|
Amounts
|
Ingredients
|
1 oz
|
Stearic acid
|
1 oz
|
Avocado oil
|
1.2 oz
|
Shea butter
|
1.2 oz
|
Emulsifying wax (AKA
E-wax)
|
1.7 oz
|
Sweet almond oil
|
Cool Down Phase (combine in one
of the small bowl/ shot glass)
|
||
Amount
|
Ingredients
|
Optional
|
.2 oz
|
Phenonip (a Preservative)
|
|
.1 oz
|
Fragrance oil or essential oils
|
X
|
½ tsp
|
Mica or liquid color (NOT food coloring)
|
X
|
1.
Sanitize all tools that will make direct contact with any
ingredients, lotion batter, or the final product (so basically every thing but
the scale).
***To sanitize put all tools (except
for bottles) in the dishwasher on the sanitize cycle. For the bottles spray or
put a bit of at least 91% rubbing alcohol in the bottles and swish it around
and then place the bottles upside down so the excess alcohol can run out and
evaporate.
2.
In the larger Pyrex measure out your ingredients for the
heated oil phase (the ingredients
you should put in here are labeled Heated oil Phase in ingredient list). You
must do this by weight since fluid ounces are not accurate. Before adding the
ingredients to the bowl you may want to measure them out individually in one of
the small sanitized bowls before putting it in the larger bowl (because you
can’t take away a certain liquid if its already mixed with another)
3.
In the smaller Pyrex (I used a 16oz model) measure out (again
by weight) 18 oz of water. It has to be distilled bottled water; the lotion
will go bad otherwise. PS, yes the 18 oz of H2O will fit into the 16
oz Pyrex.
4.
Next you will heat up both the oil and water phase. To do this
you will put them in pots half-full of water. The catch is they can’t touch the
bottom of the pot. You can put a rack in the bottom of the pot, but I found
that if I just hooked the handle over the edge of the pot they will not touch
the bottom.

· You
will heat them both up
to 170o F and then hold
them at that
temperature
for 20 minutes; this step is called “Heat and hold”.
5.
While you are holding the heat on the oils and water phase, it
is time to prepare the cool down phase. It is just as simple as steps 2 &
3, just measure out preservative, fragrance (I used sunny herb garden), and
color in one of the sanitized small bowl. The main component of the cool down
phase is the preservative. The others are optional. You cannot make a lotion without a real preservative!!!
Vitamin E and grapefruit sees extract are not preservatives, they are
antioxidants. It is unsafe, if you want an all-natural product you cannot make
lotion safely.
6.
After your 20 minutes of holding is up take both Pyrex
containers off the heat
7.
Slowly pour the water into the oils. To reduce air bubbles
pour the water down the stick blender that is already submerged in the oils.

8.
Now stick blend this for three to five minutes and then let it
sit for ten minutes and repeat the process until your lotion is under 122oF
9.
Once the mixture is below 122oF add the ingredients
labeled cool down in the box above. It is important to wait until the mixture
has cooled before adding these because these ingredients are heat sensitive.
10.
Insert the sanitized funnel into the bottles (be sure all the
alcohol has evaporated out first) and fill the bottle with the lotion. Repeat
this with the rest of the bottles
11.
Finally let the lotion cool to room temperature before adding
the tops, which should have also been spayed with alcohol. You now have
finished homemade lotion that is ready to use!!
********************************************

|
Monday, June 9, 2014
Man Soap Monday: Tobacco & Bay Leaf
 |
| from papa's tobacco plant last year |
I have been looking for a tobacco fragrance for a long time, so when I found thus I was so so happy! You may ask why I wanted a tobacco scent so bad and it is because of my grandfather. Growing up in rural Virginia my grandfather grew up on a tobacco farm. So he spent his time helping out on the farm, he even missed a year of collage because his dad needed help running the farm. Now at age 79 he still every summer gets a single tobacco plant (called the king of the garden) and grows, harvests it the proper way, and cures it, he doesn't do any thing with the cured tobacco he just likes doing so. For my grandfather's birthday I wanted to give him a soap with the scent of fresh/curing tobacco (not burning tobacco). So finally I found the Tobacco and bay leaf FO at Bramble Berry and I ordered it that very day and I am super happy with how it smelt and how turned out so let's hope he likes it too!

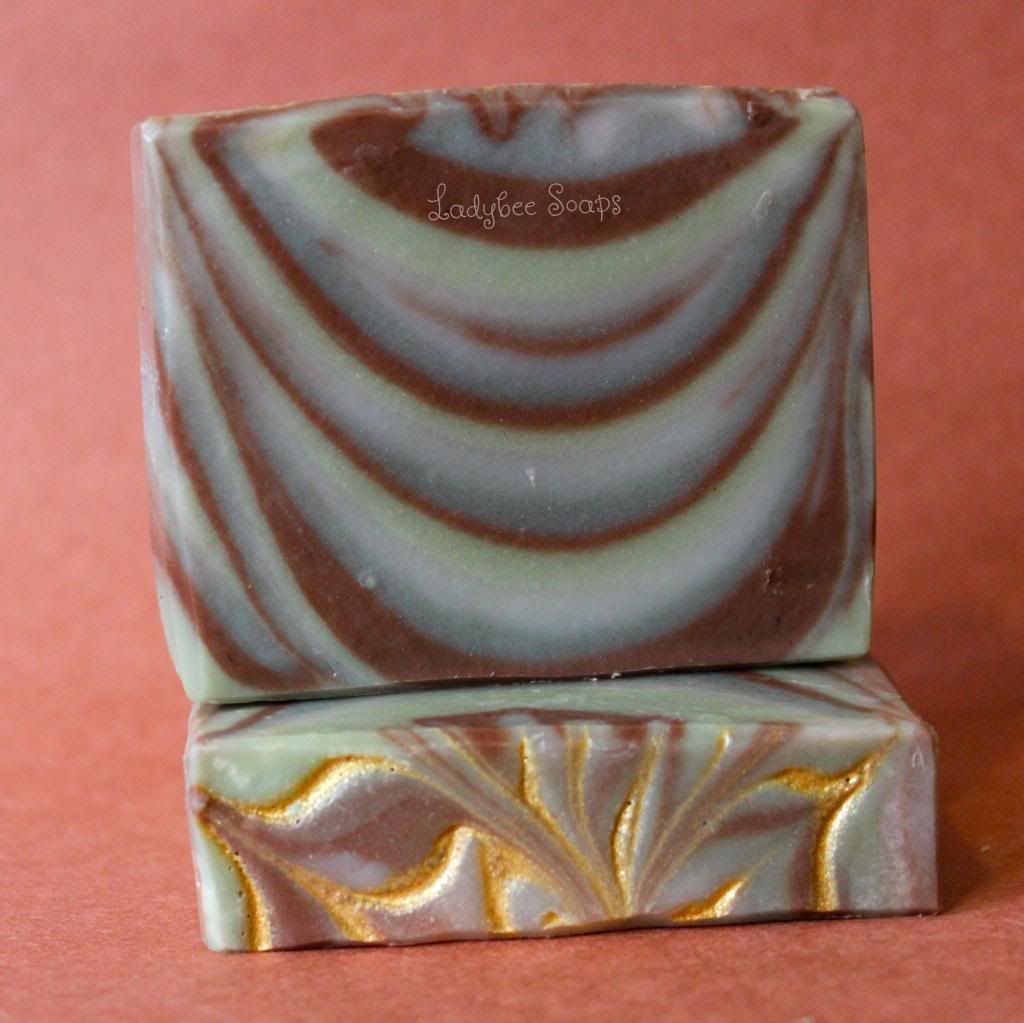
For the colors I was inspired by the different shades of the tobacco plant during the curing process. Using my grandpa's plant as a color guide I chose green, a limey- yellow green and two shades of brown. Next was the design, after really thinking about it I decided on the funnel pour since I have only done it once and it results in beautiful bars. To get the highest contrast I alternated the brown(1) /green(1)/ brown(2) / green(2). Finally as an accent I added a mica swirl on top the actually resembled a gods eye. I started adding rings of mica starting in the center and then when complete with that i pulled the micas in, starting at the edge and ending in the center. After doing that around eight times I started to do the opposite, and in between the existing spires I started at the center and pulled out the mica this time.

Here's are some quick little hints when doing a funnel pour
1. count out how long you are pouring each color, this will give you more even layers (I counted to three for this batch)
2. have a steady base elevating the funnel from the soap AND make sure the bottom of the funnel is above the mold. I use 2 duct-tape card board ring things(you know what I'm talkin about right?) on top of each other.
3. use high contrast colors to get the most dramatic result! If you chose colors in the same color family it gets you an ombre effect.
4. last but not least use a slow moving fragrance oil! thick soap clogs up the funnel and the final soap just doesn't seem to as look as good to me.
Thanks for stopping by and look out for more Man Soap Mondays!

Subscribe to:
Posts (Atom)