Showing posts with label spring. Show all posts

Sunday, April 10, 2016

Rainy Herb Garden Soap


     Spring is finally here and it is time for some Springy soap! The first of my Spring line up is the Rainy Herb Garden Soap which is scented with Bramble Berry's Sunny Herb Garden. 


      I made the garden/ grass using  a hanger swirl tool and moved it up and down between the blue and green layers. I then added the rain drops which are made of clear MP with blue glitter. To get the teardrop shape I used Bramble Berry's heart column mold and cut them in half.


Thanks for stopping by and happy soaping!
                                                                   ~Anna Rose


Wednesday, March 23, 2016

Dark Star: A Grateful Dead Soap

     If one were to press me on what my favorite animal would be my response would be different then the average millennial girl, I would tell you its a dancing bear. Even before I actively listened to the Grateful Dead I grew up with my dad and his vintage shirts with them on them from his concert days. The first bumper sticker I ever got was a dancing bear holding a rose, and at my low points I have shown disgust in those who talk about the cute little bear or calling it a "weed bear"(its happened more than once). So when I found a dancing bear ice cube tray on amazon you can be sure as hell i got it on prime. I didn't know what I was going to do with them but I went ahead and made one in every color of the rainbow with some melt and pour.
sorry for the bad Iphone quality
     After I made my army of bears, there's like 80+ of them, I painted their collars with mica. I use just dry mica and an old eyeshadow brush and it sticks the the MP just fine.
    
    My goal for this soap was a tie-dye pattern. The tie-dye plan was to do an in-the-pot-swirl and then once in the mold to make a circular pattern with a hanger swirl tool. The soap ended up being thinner than I thought (which yay! I now know Bramble Berry's lavender and cedar is a slow mover) and the in-the-pot swirl was on the verge of becoming a hot muddy mess so I just left it alone and hoped for the best. Since the top was looking a bit muddy I put the bears on so they were lying down and covering the entire top.

Another bad quality pic for y'all
     The soaping process went pretty quickly and smoothly for me and the six colors I used. I used Bramble Berry's Lavender and Cedar FO which is fresh and a nice all around uni-sex scent. When I cut into the bar it was a bit darker than I expected but I like it! For the name that was hard to decide, the last Grateful Dead soap I did was easy to name, a water type scent = Ripple. This one was harder to find something to fit the look and smell but in the end I think Dark Star fits nicely since its a darker tie-dye look. But I would be open to any suggestions that y'all think might fit this bar better!

     There was one final issue with cutting the soap, I had planned  out  how to cut it some what, but it was a pain getting whole bears in each bar. You can see the red/purple/blue bear bar is thinner than the others. In the end I gave up on having whole bears on each bar though I still ended up with less bars than usual.


Thanks for reading and happy Soaping!!
                                                  ~Anna Rose


Friday, September 5, 2014

Wine Soap- Spring Soap Crafting Club Part III

     Hey y'all! Sorry I haven't Posted in a while but I just finished my second week of school and to say it has been a big adjustment would be an understatement. And yes I am very behind with the soap crafting club, I already have two unmade summer SCC in my soaping room but I just signed up for new designs not for the private message board thing.

     The last installment of the Soap Crafting Club was a wine twist soap. It was scented with wine berry fragrance which was a bit sweet for me and sped up a little bit but besides the it all went according to plan. I used some old, past its prime red wine made by my grandfather (love him but the wine is usually not good... at all) so no fine wine was killed in the process. Before mixing the lye with  the wine I boiled it down then froze it in a plastic bag and then crushed it up into manageable chunks.

    The design itself was pretty basic, in the vertical loaf mold (with divider in) I poured the red on one side and white, well more of a beige, on the other side. Then before I took the divider out I twirled it 180 ̊ and pulled it out. My only issue was my batter got thick a bit to fast so the swirl wasn't as crisp as I wanted.

     As you can see I got glycerin rivers all though out and the circles aren't centered but besides that I like the results and will try this technique again!

Thanks for stopping by and happy soaping!!


...and happy birthday to my little Bee, who has had more than her share of experiences in her first year


Sunday, July 27, 2014

Soaping Videos II

     Hey y'all! I finally got a new computer and have transferred al my data, pictures, and videos to my new mac. This means I am now back on schedule, so to start off my return to blogging is a bunch of videos. As usual these videos will also be posted on there original post AND I will like the corresponding post to each video. Finally a little side note is that expect all my videos will not have a cosistant style for a while because I now have to get myself comfortable with iMovie '13 it is way different and more confusing then the '08 edition(PS if y'all have any tips or tricks on how to use iMovie '14 I would love, love, love your input)

                                        Find original post HERE


                                                      This has no post (and excuse the awful breakout going on)


                                  Find original post HERE


     What do you think of my videos? and if you like them and want to see more subscribe to my youtube channel and help me get to 50 followers! Finally feel free to like and comment away on my videos 'cause I love all y'alls input!!

      P.S. There are two more videos coming in the very near future (the first one will be on monday  maybe(;) along with their blog post.

Thanks for watching and happy soaping!

Tuesday, June 24, 2014

Spring Soap Crafting Club Part II∼ Coffee Ground Soap

     This month's (well May's) soap was the coffee ground soap scented with Turkish Mocha. I have been meaning to make a coffee soap ever since I started making soap but, I had never gotten around to it until now.  I replace five ounces of water with a strong brewed coffee and soaped the rest as normal.


     First thing is this soap has NO COLORANT!  that blackness is from the fragrance and the light brown is from a lesser concentration of the turkish mocha then the black half. I will say I do not like this scent at all it has some of that fake chocolate notes to it, but it looks like I was in the minority. I wish they gave us their new ecpresso scent, but it is not in the book but what are you going to do?

     This soap was super simple, to one half we added a touch of the FO and one Tbs of used coffee ground and to the other half was the rest of the FO. I swirled the divider but ended swirling it to the same position and the with a long skewer I did a few passes across the bar which gives it a similar look to a hanger swirl if you went across the bar(in a typical loaf mold), not up  and down like my last post.

*****Added 7/27/14


Thanks for stopping by and happy soaping!

Wednesday, June 18, 2014

Hanger Swirl Soap ∼ June Soap Challenge Club


Hey guys! today I will be doing a post on my first official soap challenge. Every one and a while I do the the months's design but I have never actually signed up.... Until this month. This month was the hanger swirl, but you could also do the feather swirl. I did the plain old hanger because there was no way I would be able to to a feather swirl under pressure, but one day(probably soon) I will try it. The soap I am showing you today though was not my first try. My first try was a dragon's blood soap that for some reason went faster then usual for me. So the hanger swirl didn't swirl, it does still look pretty cool so I will be doing a post on it next Man Soap Monday.

     Since the 4th of July is coming up very soon (in soapers time) I decided to do a patriotic soap! I had no "Patriotic" scents (but really what is a patriotic scent, apples???). So instead I went for lemongrass essential oil, since I know it doesn't speed up and it still kind of go with the theme. The colors. of course, are red, white, and blue. to achieve the colors I used titanium dioxide, ultramarine blue, and for the red I used a combo if red oxide and electric bubblegum  pigment.

     Now on how I got the look! I spit the batch into 3 about equal portions and colored them their assigned color. then I poured them into less then equal, not so straight layers. I then raked through my modified hanger in up and down, then side to side motions. Then I poured stripes of the extra colors on top, swirled them with a chopstick, and then to complete the soap I added some glitter ('cause what else screams USA).         
                                 
*****Added on 7/27/14

     
Thanks for stopping by and I will update y'all on how I did once I find out!


Monday, June 9, 2014

Man Soap Monday: Tobacco & Bay Leaf

from papa's tobacco plant last year


  I have been looking for a tobacco fragrance for a long time, so when I found thus I was so so happy! You may ask why I wanted a tobacco scent so bad and it is because of my grandfather. Growing up in rural Virginia my grandfather grew up on a tobacco farm. So he spent his time helping out on the farm, he even missed a year of collage because his dad needed help running the farm. Now at age 79 he still every summer gets a single tobacco plant (called the king of the garden) and grows, harvests it the proper way, and cures it, he doesn't do any thing with the cured tobacco he just likes doing so. For my grandfather's birthday I wanted to give him a soap with the scent of fresh/curing tobacco (not burning tobacco). So finally I found the Tobacco and bay leaf FO at Bramble Berry and I ordered it that very day and I am super happy with how it smelt and how turned out so let's hope he likes it too!


     For the colors I was inspired by the different shades of the tobacco plant during the curing process. Using my grandpa's plant as a color guide I chose green, a limey- yellow green and two shades of brown. Next was the design, after really thinking about it I decided on the funnel pour since I have only done it once and it results in beautiful bars. To get the highest contrast I alternated the brown(1) /green(1)/ brown(2) / green(2). Finally as an accent I added a mica swirl on top the actually resembled a gods eye. I started adding rings of mica starting in the center and then when complete with that i pulled the micas in, starting at the edge and ending in the center. After doing that around eight times I started to do the opposite, and in between the existing spires I started at the center and pulled out the mica this time.


Here's are some quick little hints when doing a funnel pour
    1. count out how long you are pouring each color, this will give you more even layers (I counted to three for this batch)
     2. have a steady base elevating  the funnel from the soap AND make sure the bottom of the funnel is above the mold. I use 2 duct-tape card board ring things(you know what I'm talkin about right?) on top of each other.
    3. use high contrast colors to get the most dramatic result! If you chose colors in the same color family it gets you an ombre effect.
     4. last but not least use a slow moving fragrance oil! thick soap clogs up the funnel and the final soap just doesn't seem to as look as good to me.


Thanks for stopping by and look out for more Man Soap Mondays!


Wednesday, May 14, 2014

Surplus Honeysuckle Soap


Hi guys! I am the beach this week and have an old soap I forgot to post to share with y'all. My mom's birthday was in the beginning of April so I made a soap for her 4 weeks early to allow cure (yes I am that late). While I mentioned it I will say the beach is great and I would show you pictures but I left my memory card for the camera at home :(. I will say I haven't been spending much on the beach since I am a red-head and on the first day I got my back totally fried so I am just staying a way from the sun like a little vampire.


  So for my mom's special batch I made a batch with one of her favorite scents, honeysuckle. Living in the south and in the country we have wild plants every where, and if you didn't grow up or live down here you may not know that not only do they smell good but every summer we drink that little drop of nectar in the flower and it reminds my mom of her childhood.  I use surplus honeysuckle from BB which smells so good and a bonus it is also very cheap (around $8.50 for 8 oz)! For colors I wanted it to looks like the honeysuckle flowers on the bush so I used green as the base and for the 'flowers' I used three different colors, the off-white and yellow are different shades that the wild (and tasty) flowers  come in, and the red (which was supposed lighter) represents a decretive honeysuckle plant in our garden.


    I used a new technique I thought of, I guess you may consider it kind of a drop swirl?? You can see how I do it in my video (yes I can upload videos at the beach house!), but I will tell you here a brief description of what I did.  So I split off a third of the soap maybe and divided it among three squeeze bottles with and mixed the three flower colors into them and then colored the left over 2/3 soap batter green. I poured the green about a quarter of the way up the mold and then squirted the three colors in an up and motion with three or four passes of each color, and then repeated this method around three more times or until the mold is full. Then on the top T squirted the left over soap in the squirt bottles on top and swirled with a chop stick! I like how this method turned out but I may try it again with a very slow FO because while surplus honeysuckle isn't like really fast it still set up enough so the the accent colors didn't penetrate the green as much as I wanted it to so it left the colors in lines and not distributed throughout the whole bar.

     Here is the making video so you have a better idea of how I did it

Sunday, April 27, 2014

Georgia O'Keeffe Inspired Soap


     In February I went to NYC to go to the Westminster dog show, and while there went to some museums. We went to the Museum of Modern arts and the Whitney (where I took a ton of pictures) and while going through I found inspiration. It is a Georgia O'Keeffe oil on canvas painting at the Whitney but I cannot remember the name (If you know it comment below). It reminds me of an abstract river type thing.

     First decision was the scent, being a river painting I chose a water type fragrance, Aqua Spa (at .5oz ppo) from wholesale supplies plus. When I added it to the soap  it formed white spots in the batter which turned brown innthe cured bars. Then colors, I used the four main colors of the painting, off white, dark blue, light blue, and teal. Finally was how to pull off the design, it is hard to explain when I can upload the video and you can actually see what I did I the explanation confusing.

  1. 1/4 tsp shimmering sea foam mica + 1/8 tsp cambridge blue mica (1 cup)
  2. 1/4 tsp cambridge blue mica (1 cup)
  3. 1/4 tsp peacock blue mica +1/8 tsp petunia mica + 1/816 tsp espresso black mica (2 cup)


    OK here it goes...
     First off is the soap was at a medium to thick trace but mor on the thicker side. First I tilted the mold and added the uncolored batter so it just came to the elevated end. Then came the colors, I added a touch of teal to the shallow end and then probably added an thick layer (1/8-1/4 inch) of  dark blue and the same amount of light blue on top. Then  while still tilted I added a thick white layer, but making sure a bit of the color was still showing on the shallow end. Then I  set my soap down on a level serface and repeated the colors making sure the two colored layers touch on one side. THEn I made sure to add white to one side (the side that was the shallow side) and then added some dark blue to the top of that and covered the whole thing with white. I piled the left over colors on top, which I eventually cut off. Hope this helps?!   and I will hopefully get the video up soon!


** video added on 5/14/14**


Thanks for stopping by and happy soaping!


Monday, April 21, 2014

Orange Sapphire Soap

     Recently I have been on a soaping spree but haven't gotten around to sharing with you because of videos... Where I live we have satellite internet (sooo close to fios but it stops a mile from my house) this means we have only get certain amount of data we can use a day. This means no uploading (or watching) youtube unless we don't want to use the internet for 24 hours. So since I can only upload when visiting my sister in town I have decided that I will just post the soaps and upload videos in mass. When I can and I will put them all into one post when they are up + add the videos to the proper post!

     Back to soap! Ever since I got the scent Orange Sapphire (from WSP) I have had the design in my head, orange balls surounded by a sapphire base (I am so creative...).  So when I made a bunch of embeds I including three different sized orange balls that was needed for this soap. Then in order to make it look more orange-like I dusted the embeds with orange mica, while this is a pretty technique it is SO messy I swear there was orange mica on me for days. The soap was super easy though, a one color soap at thick trace and putting some balls here and there, how much easier could it get?


     The final notes are that this fragrance soaped great at .5 oz per pound of oil, to achieve the blue I used 3/4 tsp sapphire mica, 1/4 tsp ultramarine blue, and 1/8 tsp espresso martini mica. And as a bonus with the added 20 or so ounces of soap oranges I was able to fill up both of my two pound loaf molds!

Thanks for stopping by and happy soaping!


***UPDATED to add video!***

Monday, April 14, 2014

Lavender Crazy

     They say diamonds are a girl's best friend, but lavender is a close second! Lavender is on of my favorite things, I love the flower, the flavor (lavender lemon goat cheese *yum*), and of course the smell! It is a fresh, green, herbal, and floral, year round scent plus it comes as an all natural essential oil. There for it is only natural to put it into all different kinds of products.

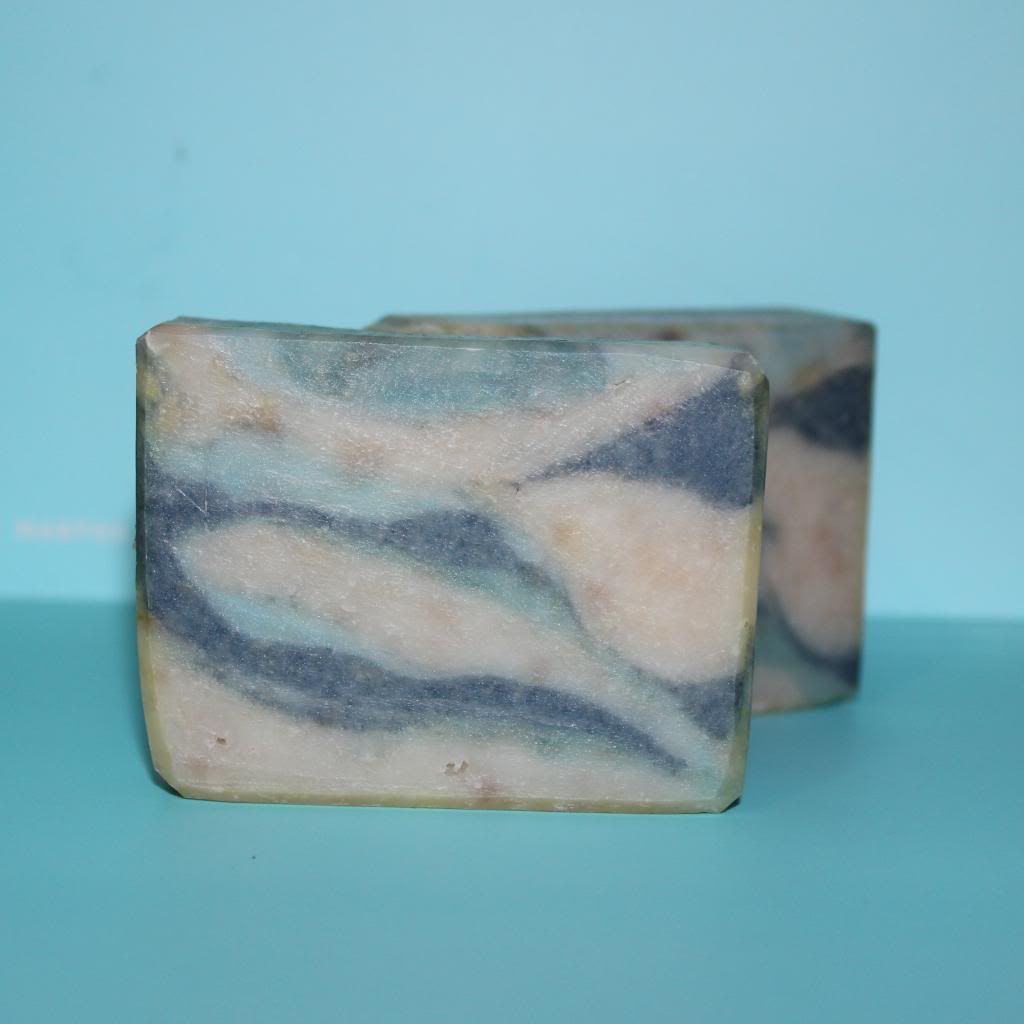
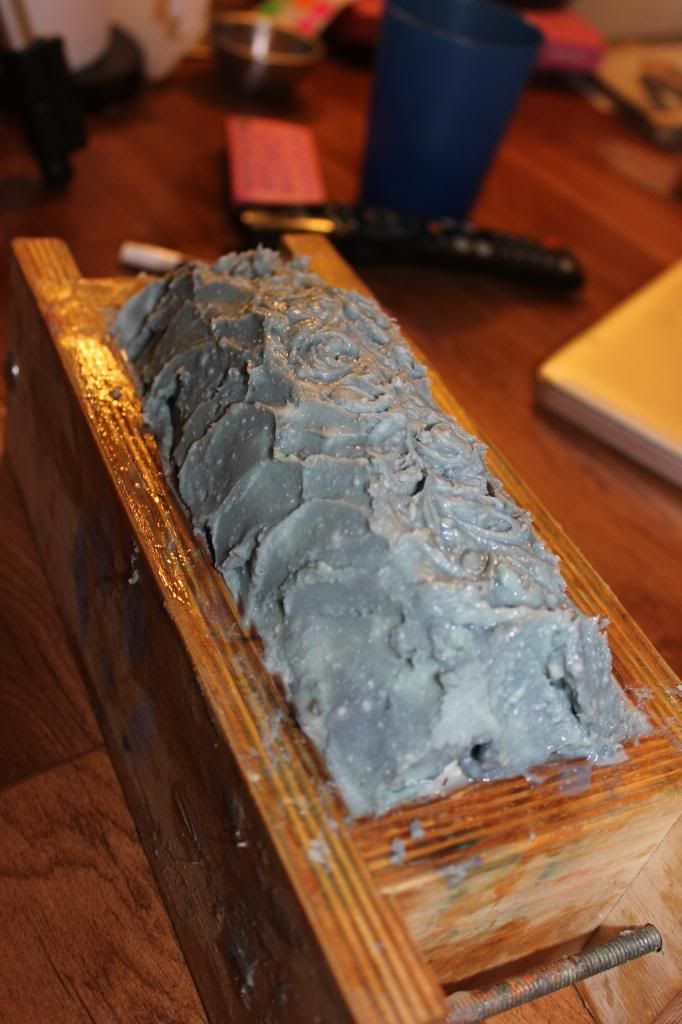
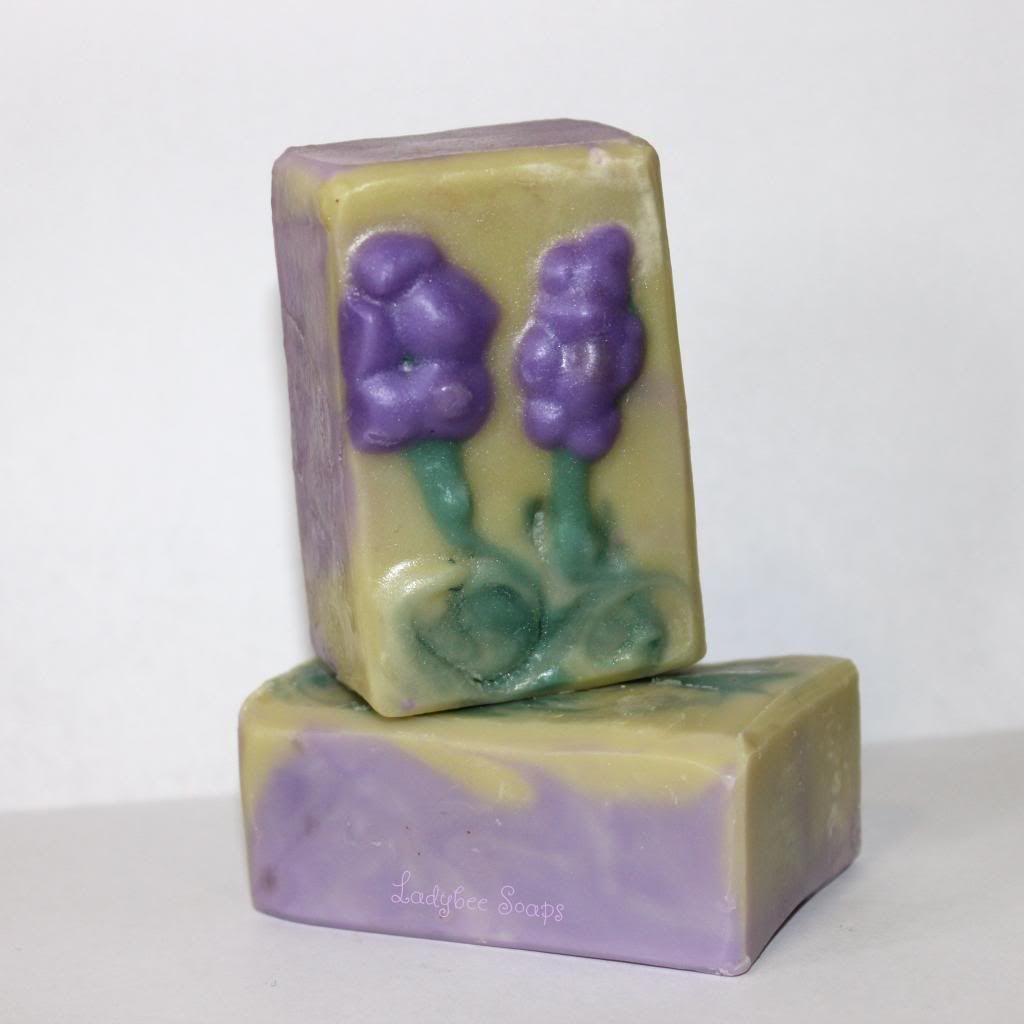
    I finally made some lavender EO cold process soap which I haven't done in forever (since my first ever batch!). Knowing lavender goes fairly slow I wanted to do a fun design. I ended up going for layers with a picture of a lavender plant made with squeeze bottles... It did not go well the stems are to thick, the buds awkward looking. So out of 9 bars I have one pretty one but thats how it goes, not every batch goes perfectly.

@@   
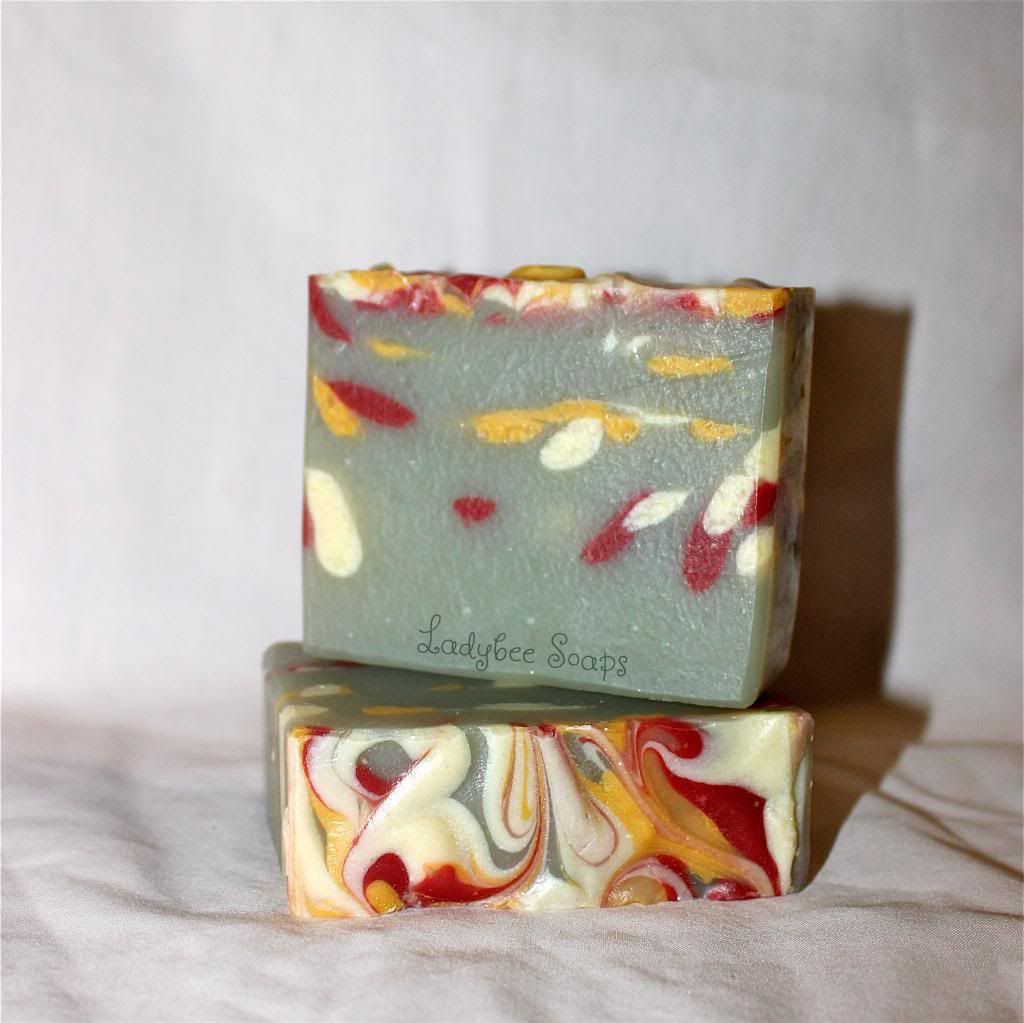
A few notes on the soap-
-.75 oz ppo of Lavender 40/42
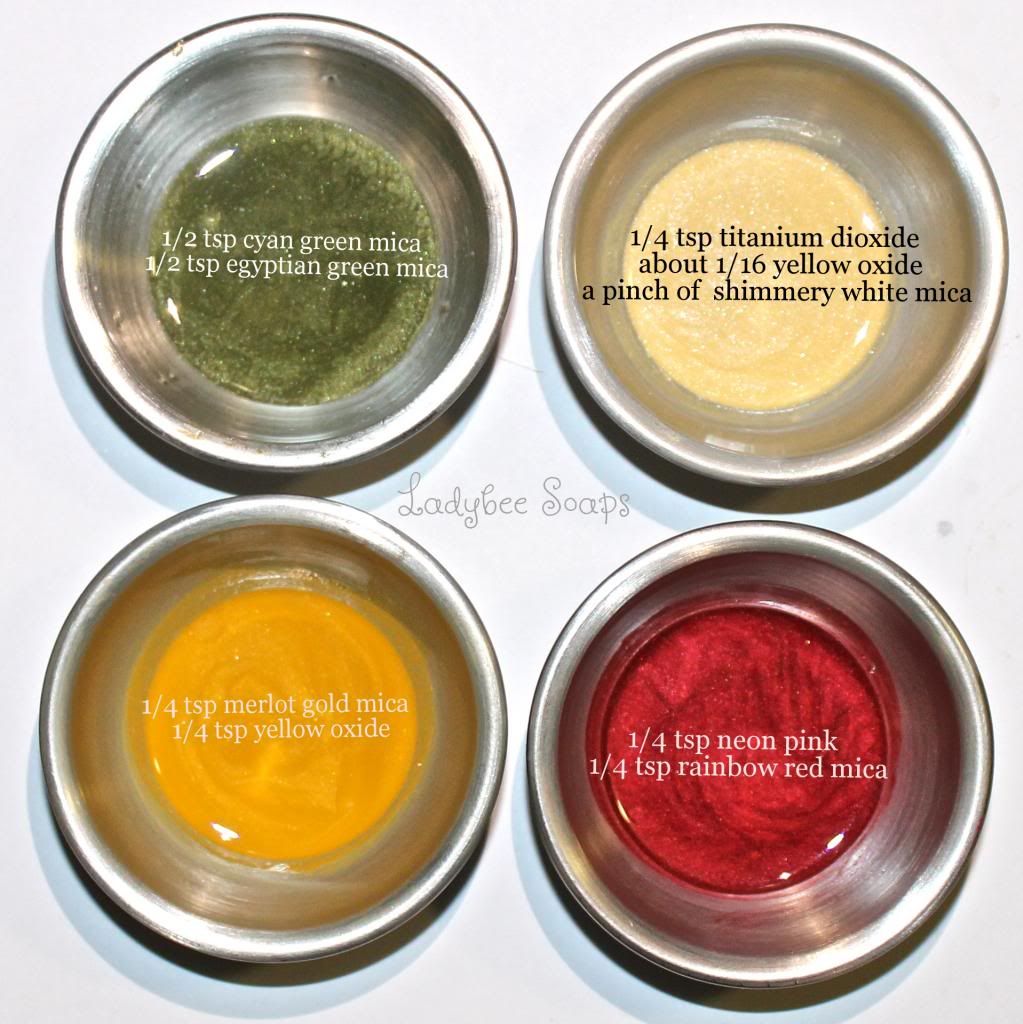
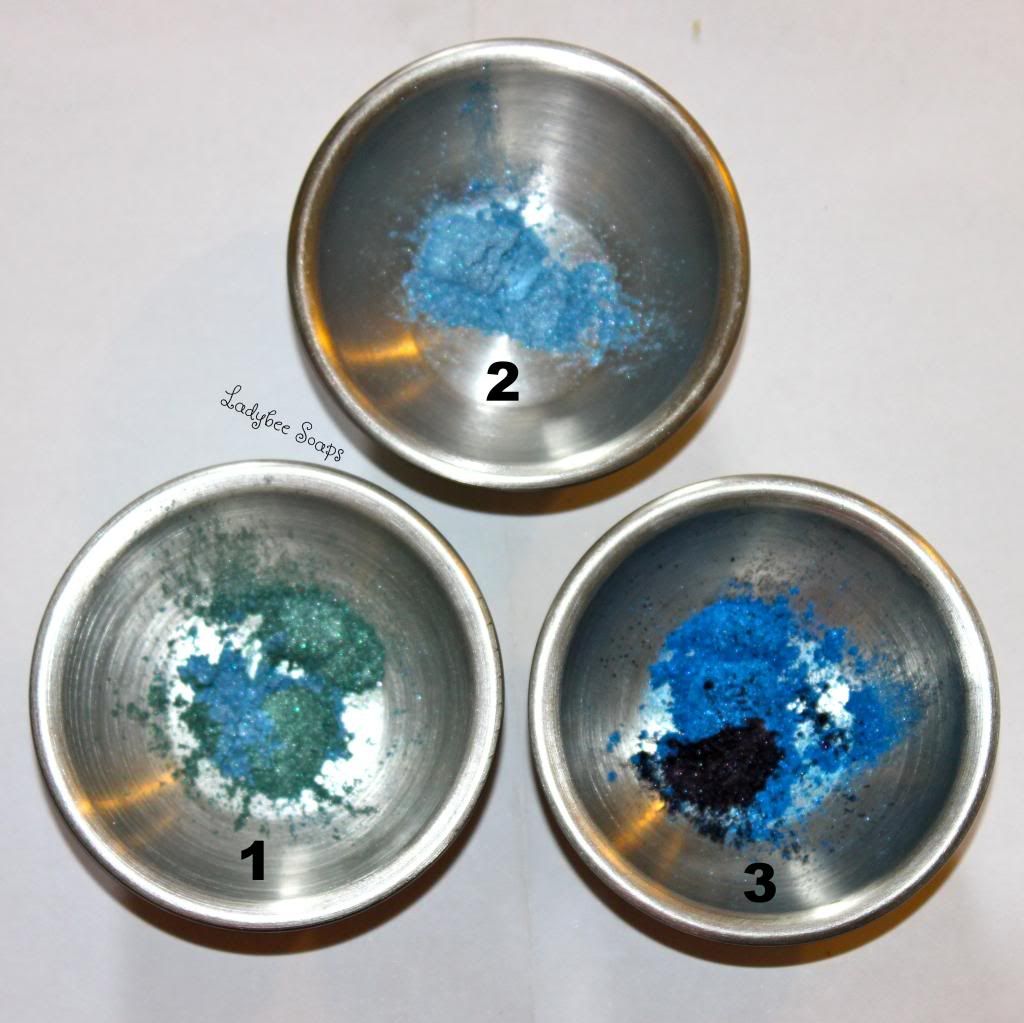
colors used were....  

1. violet mica (both  flower buds and first layer of base)
2. golden jade mica (green portion of base)
3. shimmering sea foam mica (stems)


     Some key benefits of lavender essential oil (according to aromatherapy) include its relaxing and calming abilities. When I come home from a long day I get in my tub with a lavender bath bomb to take advantage of it relaxing effect, plus it also helps relieve some headaches that come from the fore mentioned crazy day!


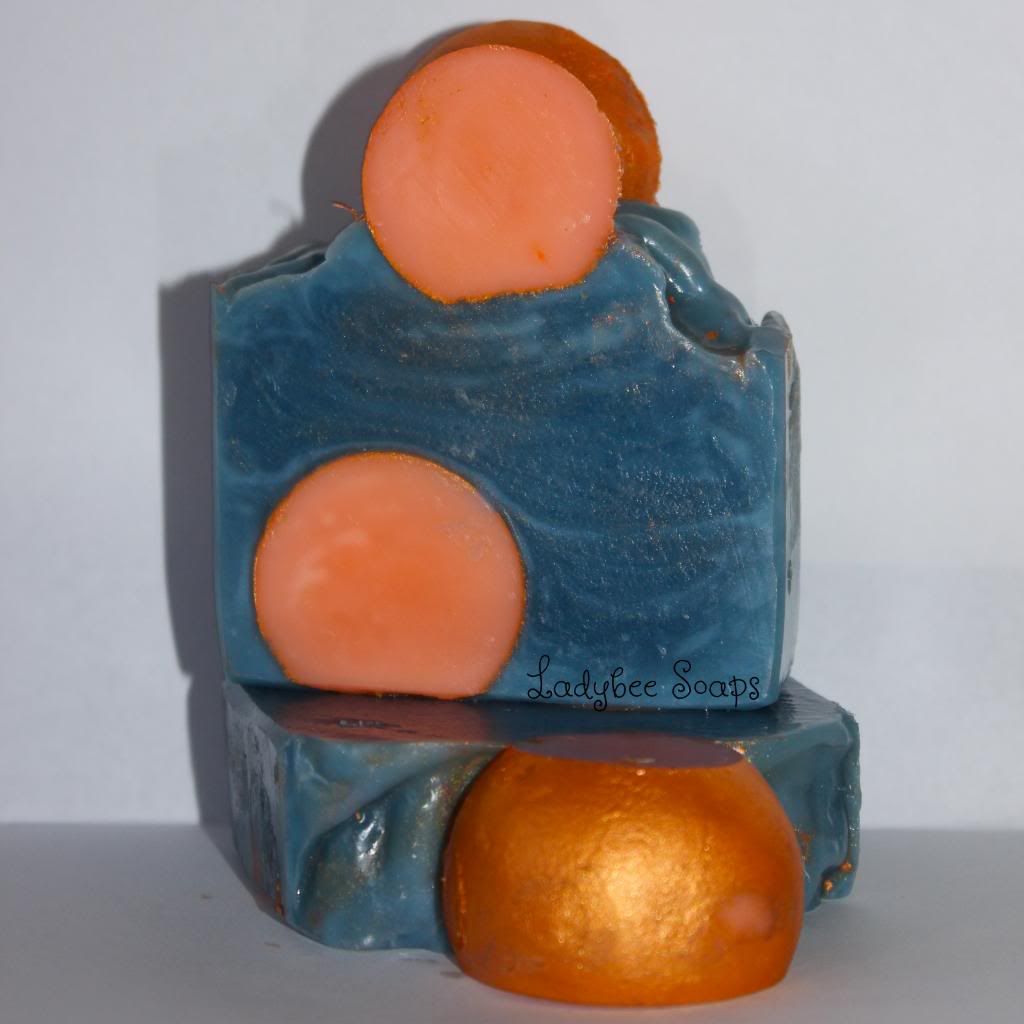
A few notes on the bath bombs-
-5mL of Lavender 40/42 for 1lb of mix
-mixed into the base are calendula petals and lavender buds
-It is colored with lilac La Bomb (from Bramble Berry)


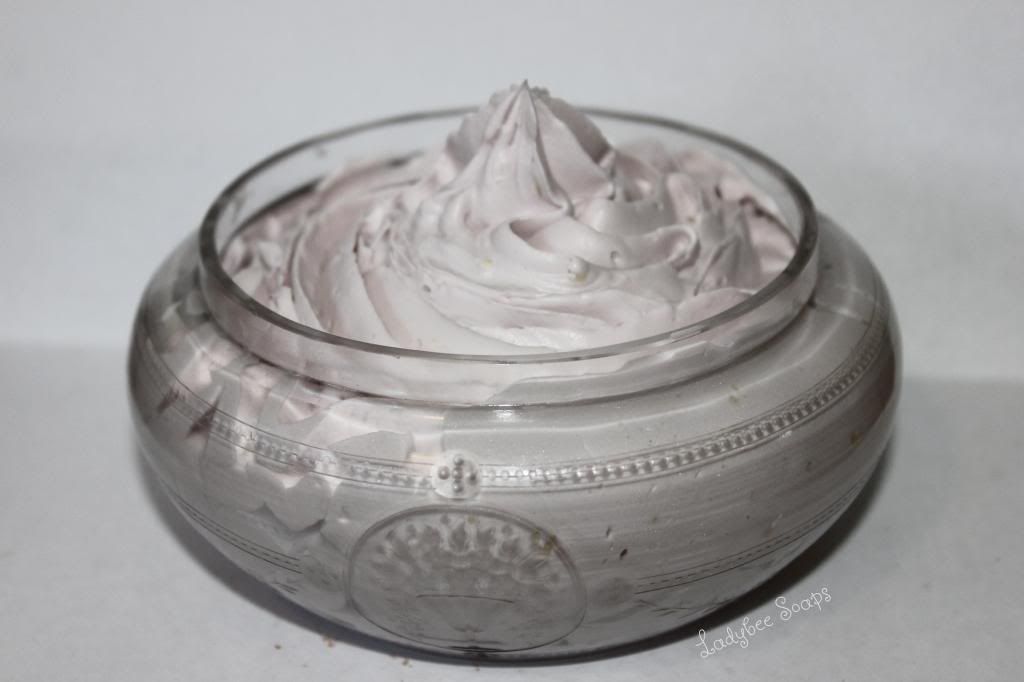
     Finally since both of these don't let the scent stick very well I make a lavender whipped body butter! Soon I will try to make lotion but preservitives and microbes scare me :O.  I use my whipped body butter every night on my hands, legs, and feet (feet followed by socks to keep all the moisture in).


     A few notes on body butter-
- colored with violet mica
-scented with 10 mL of lavender 40/42 for 22oz of base
- label made by me on word, stuck on with clear packing tape (it's water proof ;) )


Thanks for stopping by and happy soaping!
PS visit my youtube channel for a mica haul!
Related Posts Plugin for WordPress, Blogger...